
We bought 3 pieces of furniture off Craigslist last year for $60 total – a coffee table, an end table, and this table that I decided to use as our entry table. This was my first attempt at painting furniture of any kind, and I think it turned out really well! I painted it with Chalk Paint, “antiqued it” and then added a wax to it. I had always wanted to try chalk paint, it was really forgiving and a lot less work then trying to paint something neatly. It was fun to “beat up” the furniture as well! I wish I had taken more photos, but I do have the 2 other pieces I plan on painting at some point, so I’ll be sure to better document those transformations!


My kids love fresh fruits and vegetables, and although I love baking I rarely find much time to do it, so when I can bake, there’s nothing better then combining those 2 together. I get to bake and make something that I know all the kiddos will enjoy and look forward to eating. They also all love to help out, it definitely takes a bit longer and makes quite the mess, but they really enjoy it and I love being able to show them how their food is made. This recipe I found online awhile ago and tweak a little, I love a good crisp and this recipe is great for that. It’s a pretty sweet dish and although I make it a lot during the colder months when blueberries aren’t nearly as sweet, it can be made anytime just adjust it accordingly for sweetness(if the blueberries are super sweet be sure to cut down on the sugar in the base portion.
INGREDIENTS
2 Pints of fresh blueberries (about 4 cups)
1/2 Cup Sugar
2 tbs Cornstarch
1 Cup Water
1 Freshly Squeezed Lemon
1⁄2 teaspoon Vanilla Extract
TOPPING
1 Cup All-Purpose Flour
3⁄4 Cup Old Fashioned Oats (regular)
1 Cup Brown Sugar
2 Tsps Cinnamon
1⁄2 Cup Butter
Preheat the oven to 350 degrees. Rinse the blueberries and pour them into a 9 x 9 inch pan. Pour sugar, cornstarch, water, lemon juice into a small saucepan, stirring frequently and heat until it becomes think and clear. Remove from heat, stir in vanilla extract then pour over the blueberries and gently stir.
Combine the flour, oats, brown sugar and cinnamon in a small bowl and stir until evenly mixed. Melt the butter and add it to the mixture until it’s consistent.
Pour crisp over top of the blueberry mixture, I usually take a fork and try to disperse it as best as possible into the middle and then spread it towards the edges.
Bake for 35 minutes, adjust time if necessary, it should be bubbly and the topping browned.
Our family loves to serve this with a bit of vanilla ice cream. It’s definitely sugar-y enough on it’s own, but we like the flavor combination.
Enjoy!
]]>So after months and months today was the day we signed the loan which means that within a few weeks they’ll begin digging, how exciting! Our vision is for a modern farmhouse – a comfortable place that we and our children will love to call home. A home that offers modern conveniences with farmhouse elements – we’re hoping for those touches such rustic flooring and an apron sink that will bring that vision to life. I’m sure a lot will change along the way, so we’re going to try to document it as best as possible not only for ourselves, but for our friends, family and anyone else that wants to follow our journey as we watch our dreams become reality.


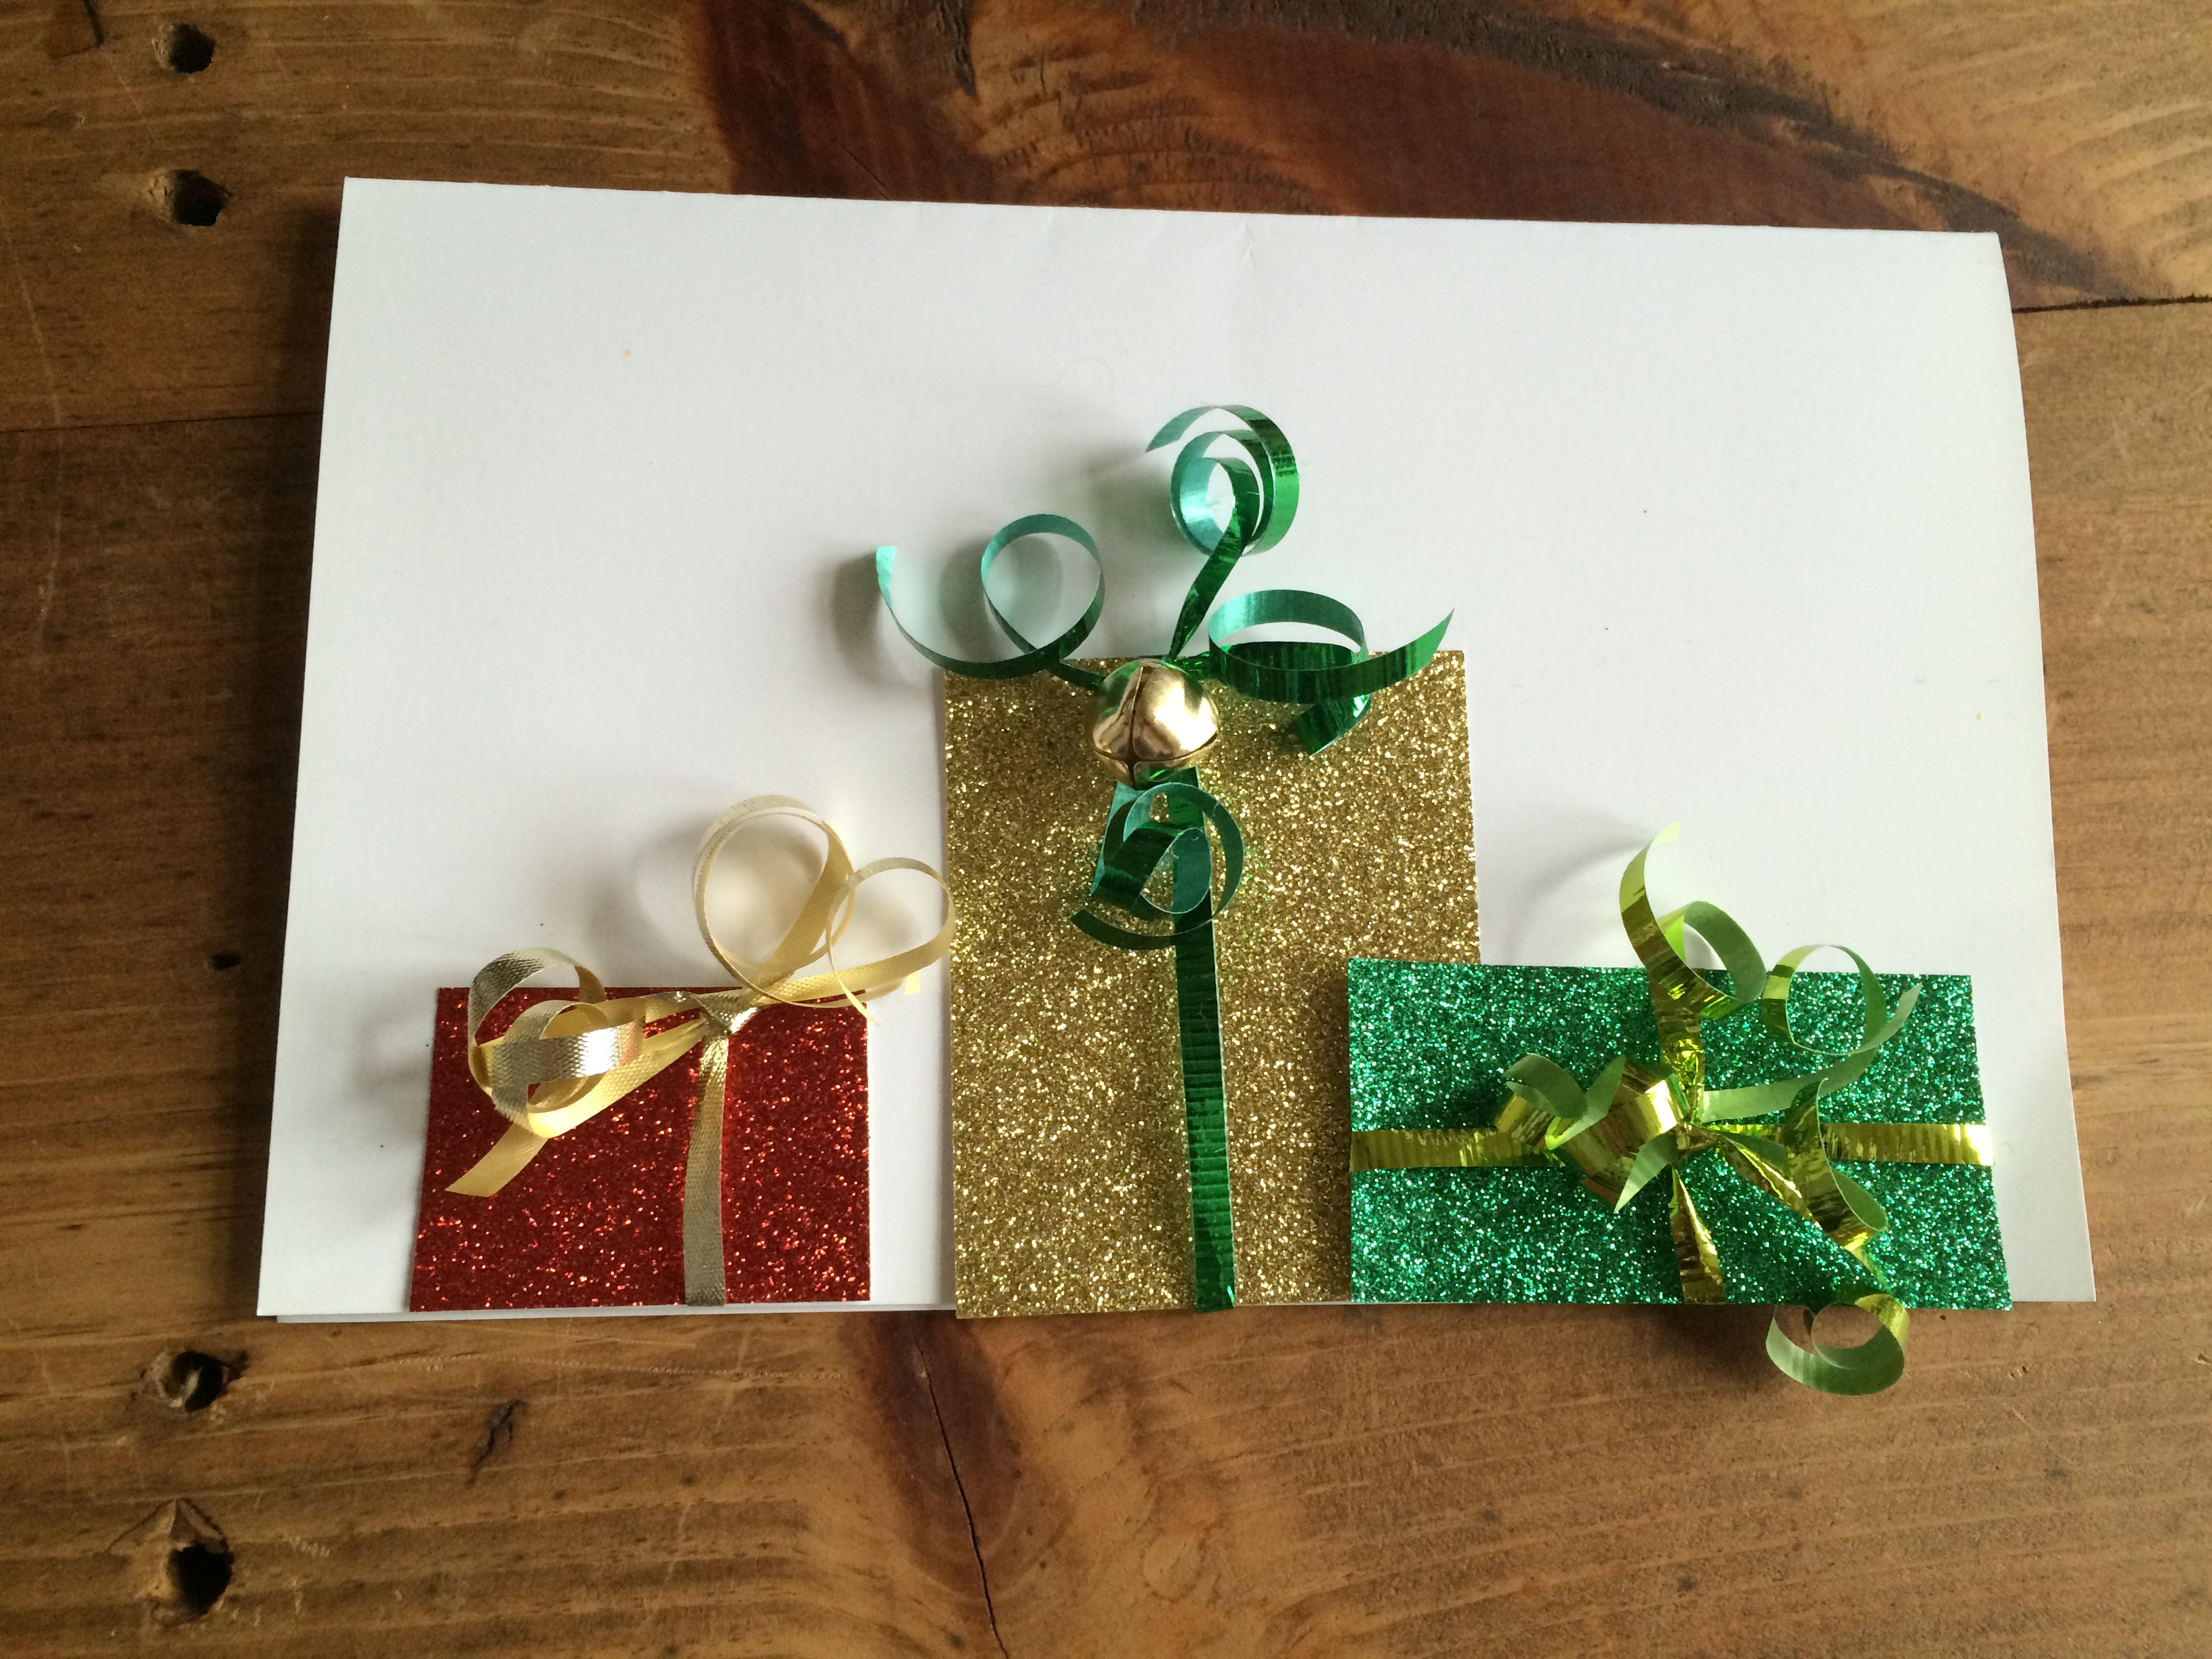
I decided to take on a pretty big project for Christmas – making and sending out my own handmade Christmas cards. I was inspired by a story I read about a woman who created handmade cards every year up until her death and the year she passed away she started the cards. Her daughter decided to take on the task and reminisced about how much people loved and looked forward to her mom’s cards. It was a really cute story, and although I doubt it’s something I might ever even do again, it was fun to try at least this year.
I had previously purchased glitter scrapbook paper and wasn’t quite sure what to do with it, so it came in perfect for this project. I went through my miscellaneous craft box and came across a pack of small bells. The ribbon I had on hand for wrapping gifts from previous years, and the only other thing I needed was tape and staples. Yes, I used staples. I initially tried to sew the papers together but it took forever.
Before you attempt to do this I’ll give you a great tip from a lesson I learned. Do NOT mail the cards with the bells on them. Either make them without the bells or hand deliver them. I did not realize that when I went to mail them the height the bells created changed them from normal postage mailings to “packages”. It ended up being I think $1.20 per card to send them, plus they all came back rejected and I had to resend them.
The number of materials will depend on how many cards you’re making
WHAT YOU NEED
Glitter Scrapbooking Paper
Cardstock & Envelopes
Small Bells
Ribbon
Stapler & Tape
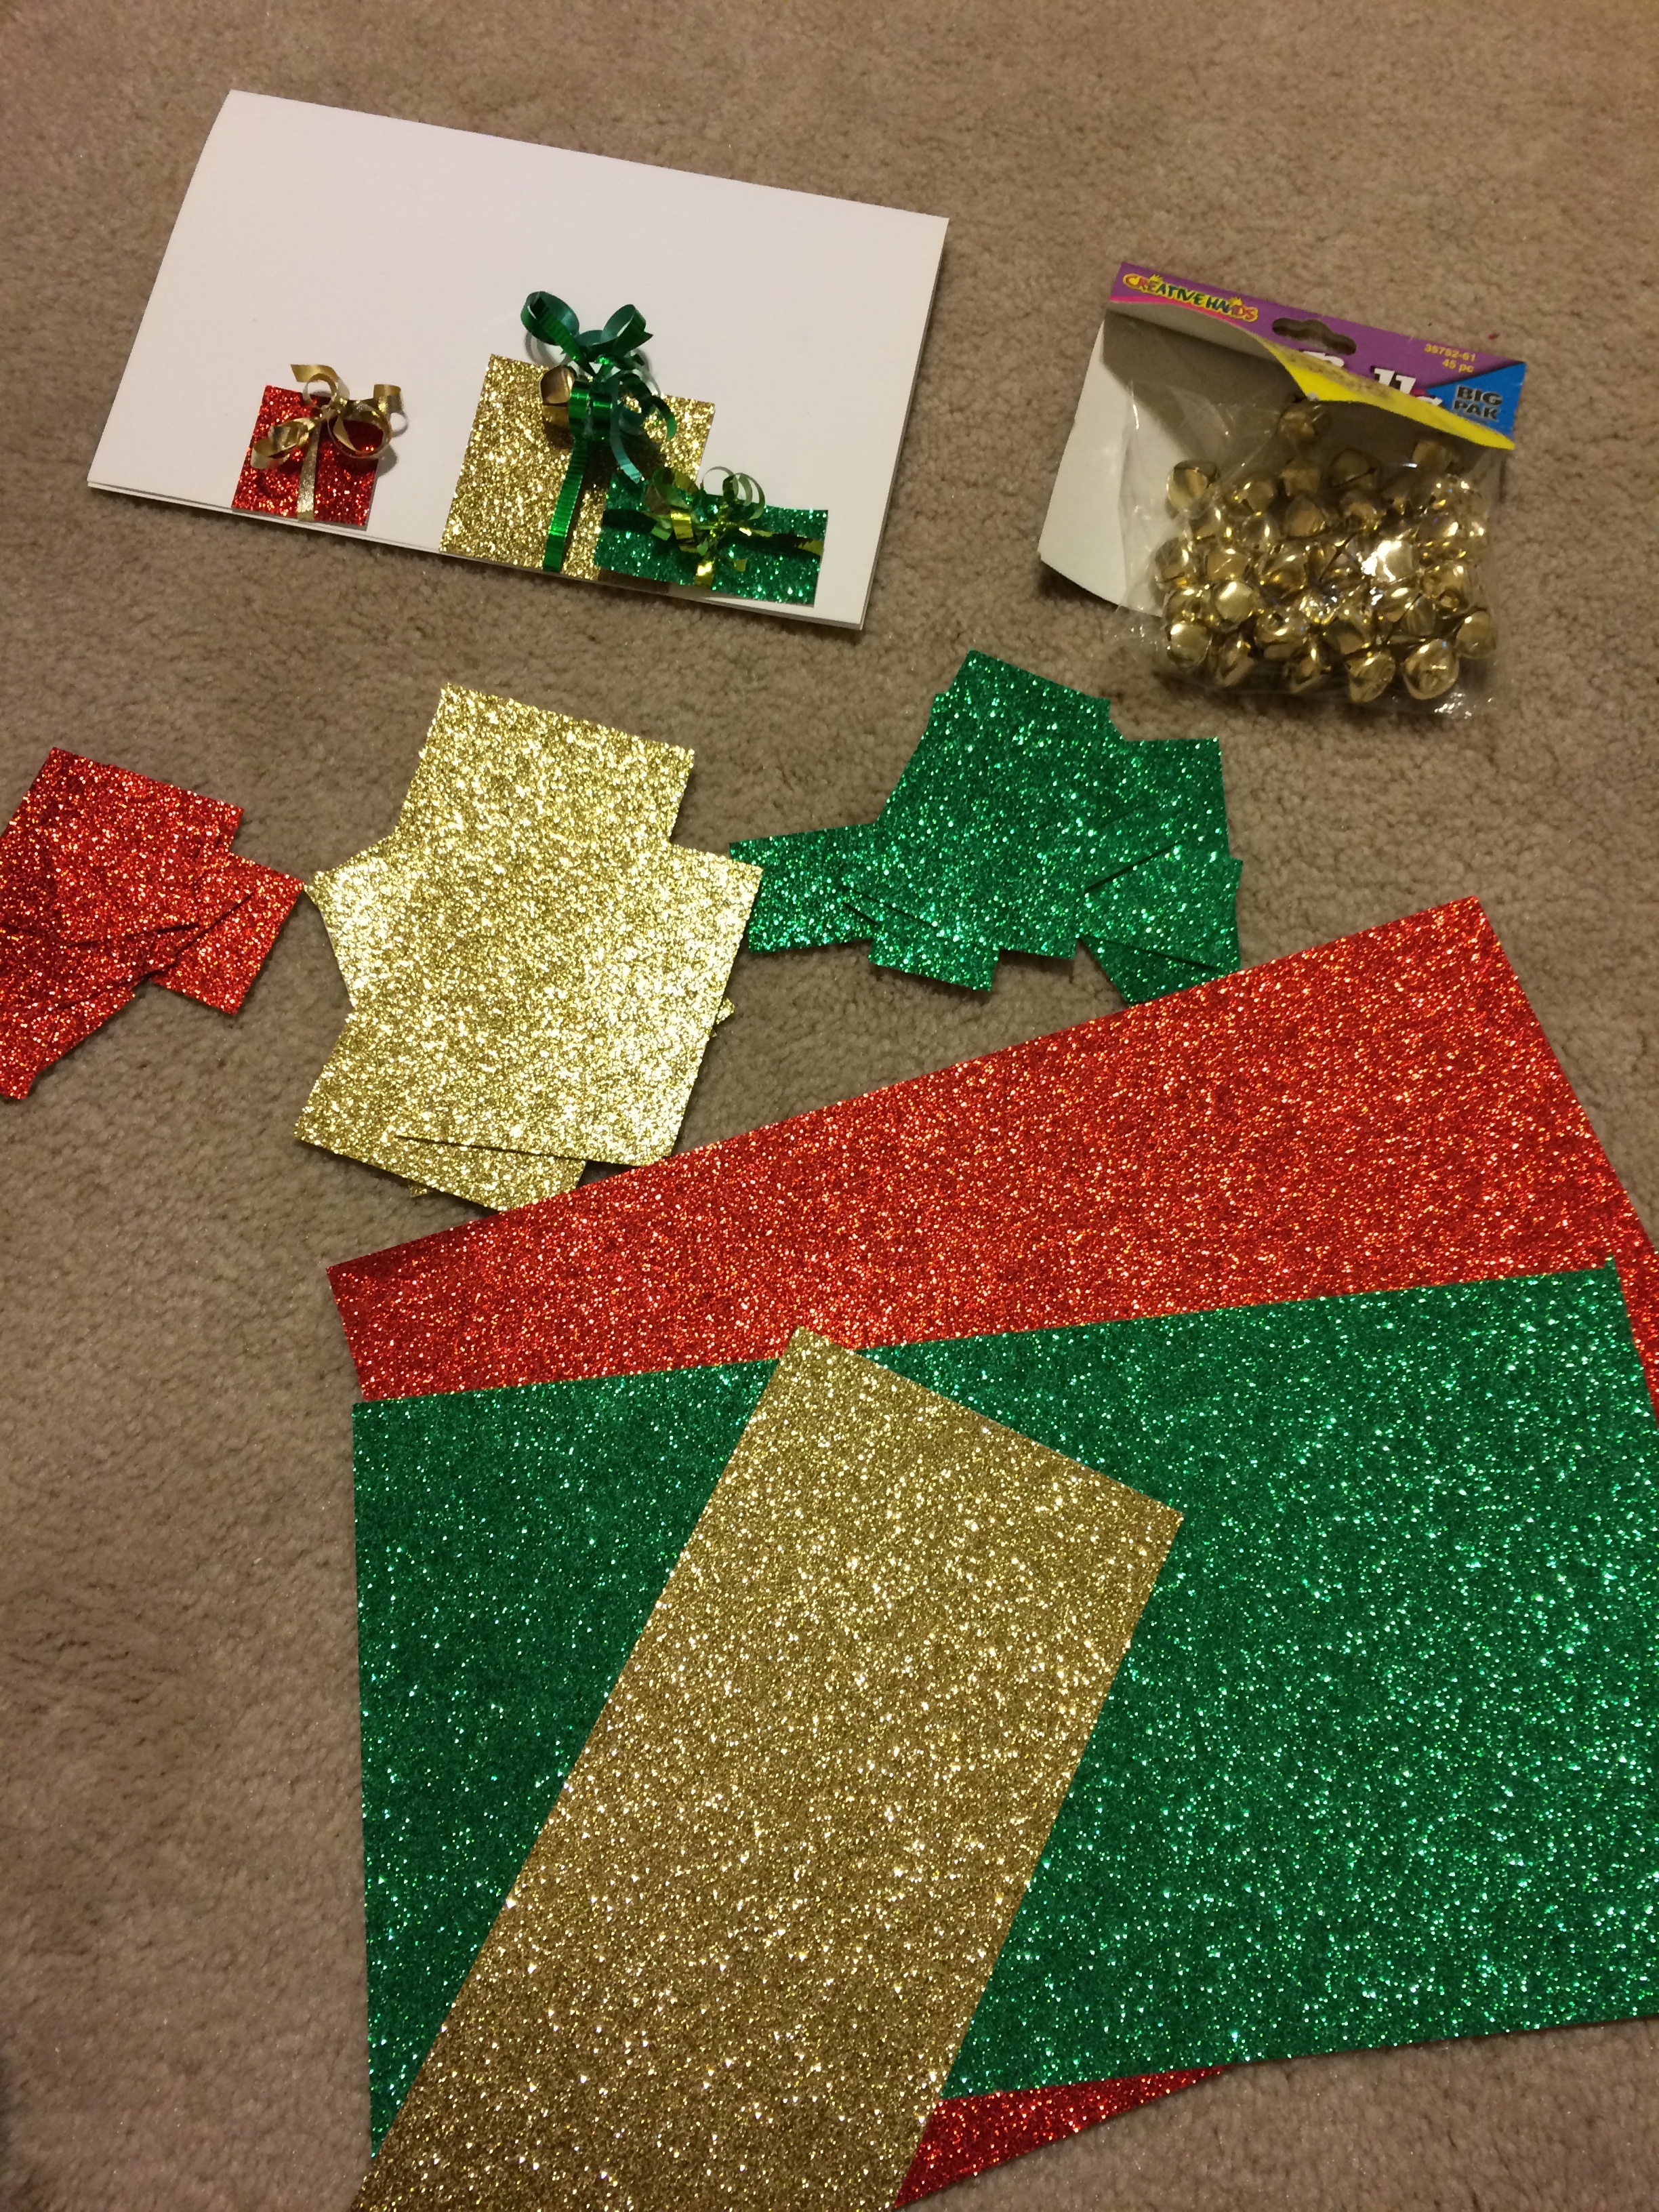
STEP 1
Cut out glitter stock paper into “present” shapes and staple to card. Place staples in a spot where you can tie a ribbon on top of them to cover the staples.
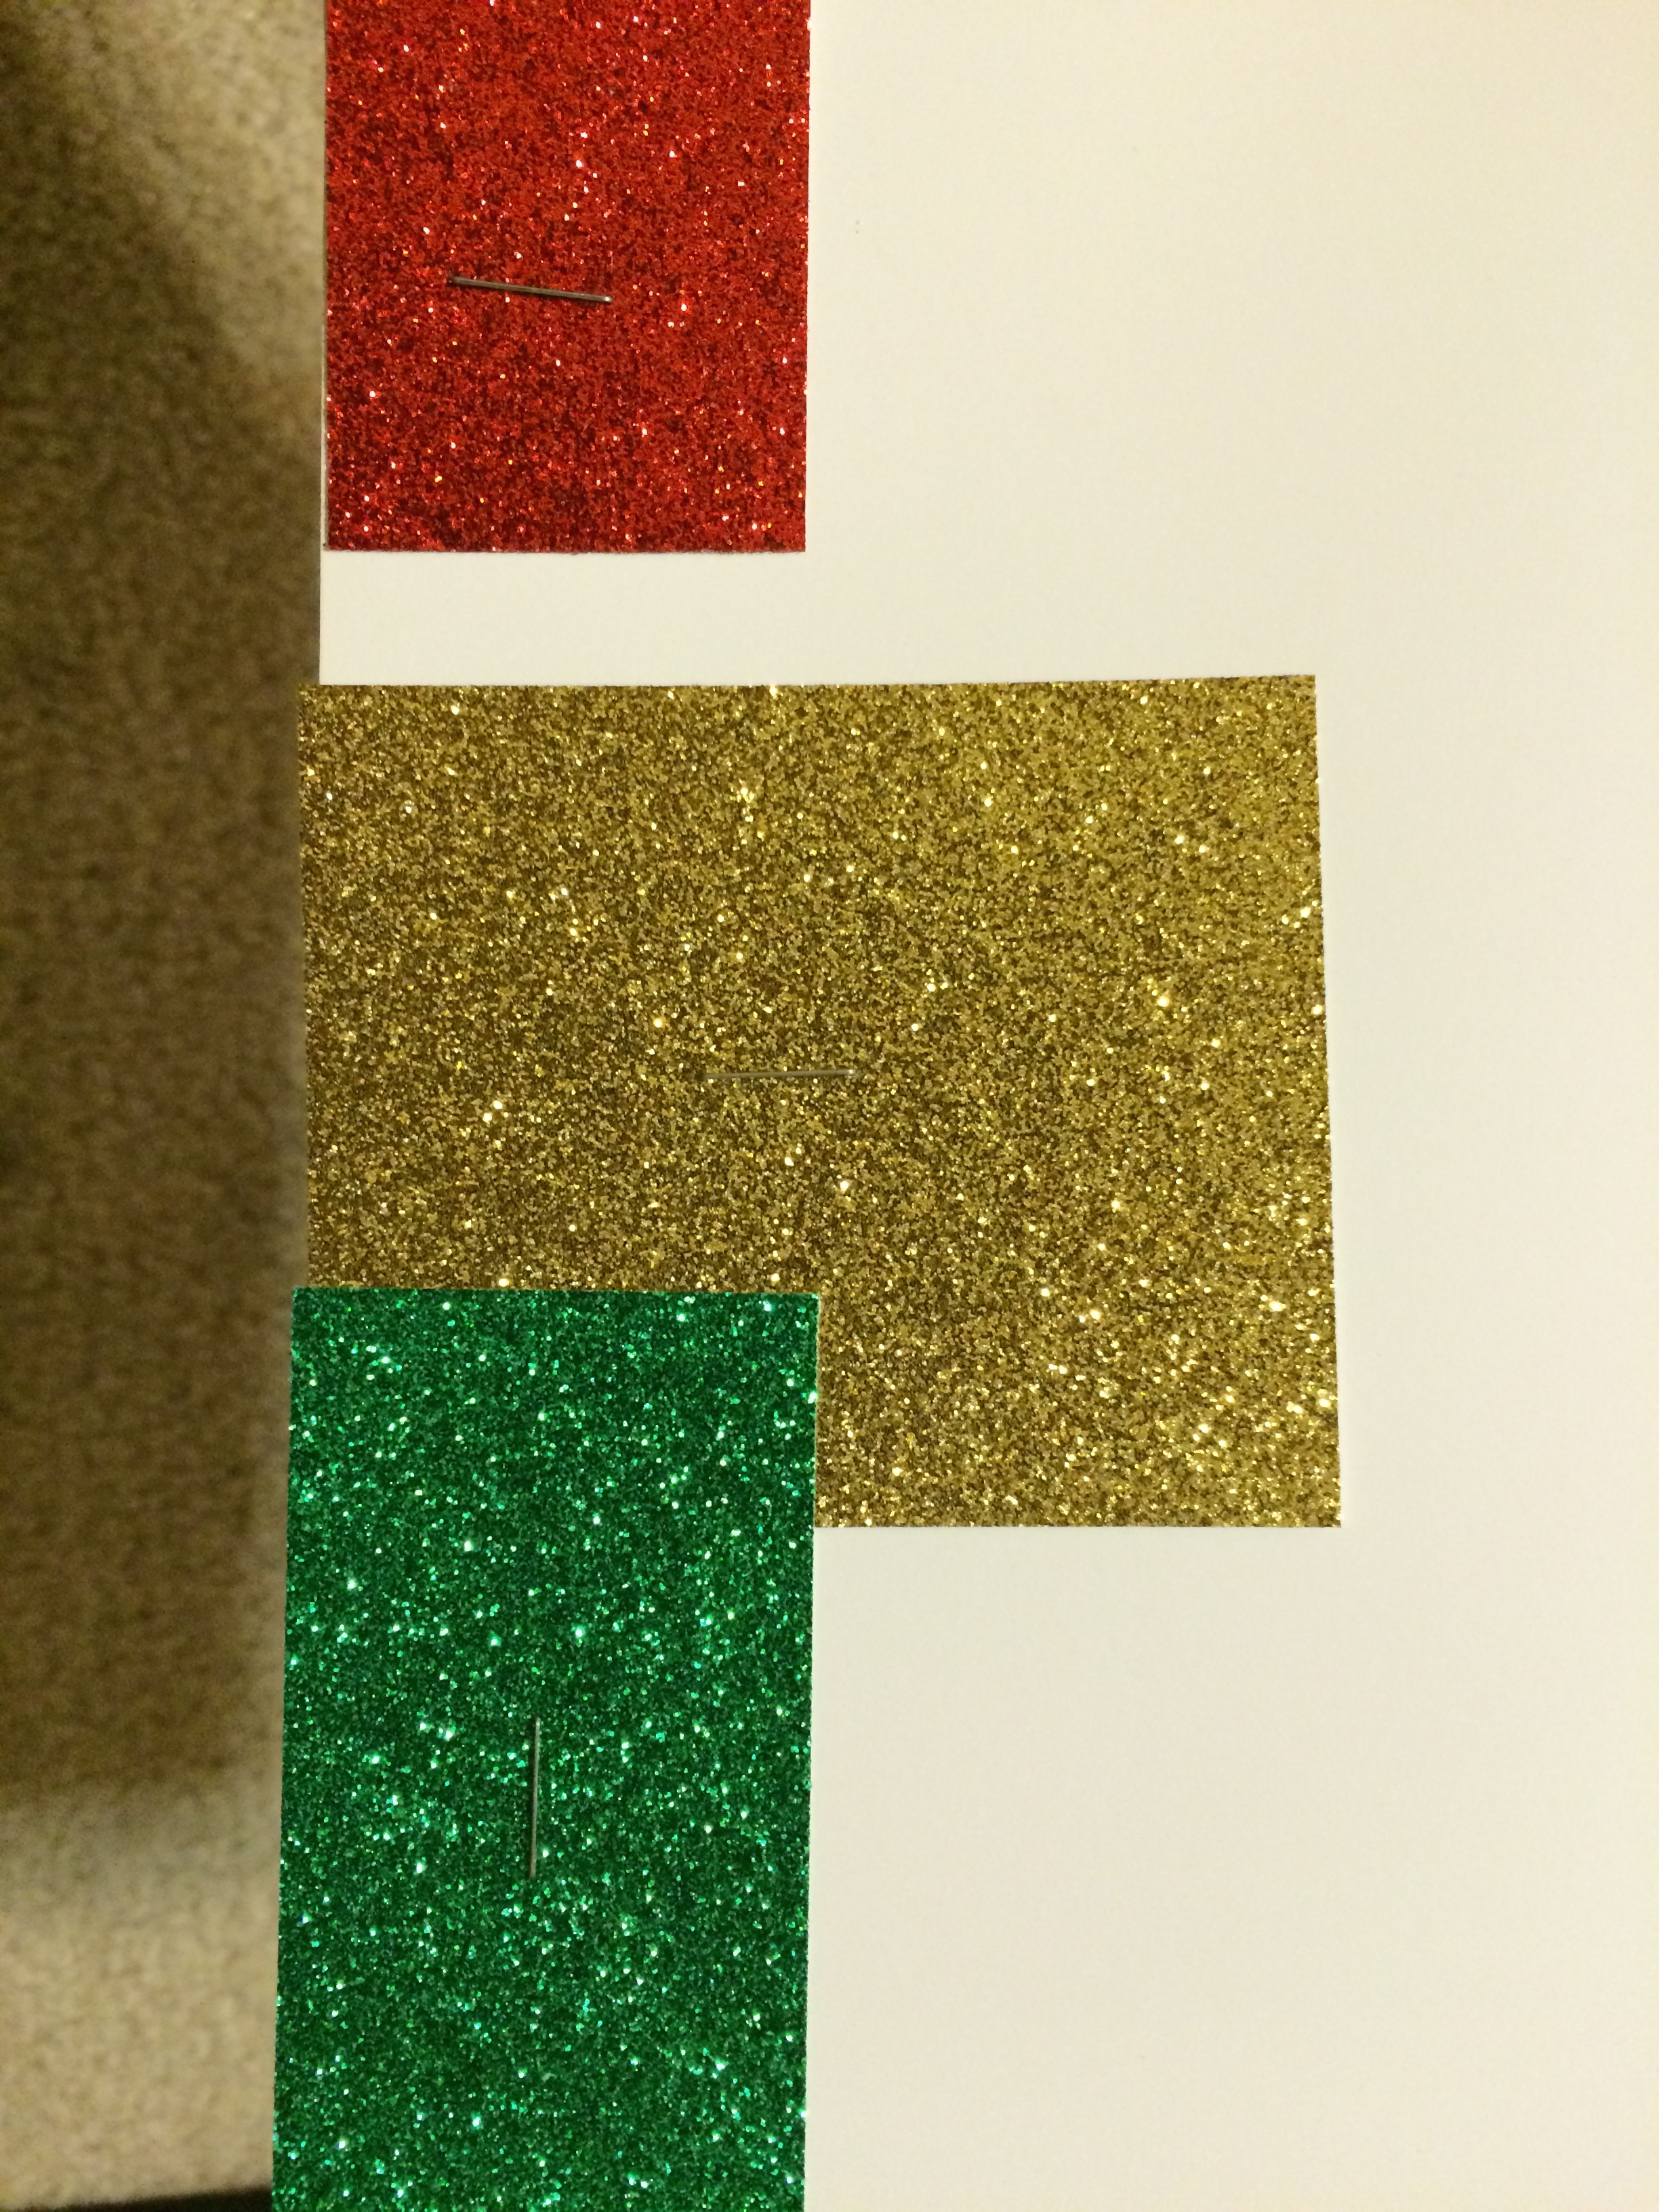
STEP 2
Tie ribbon over each present to cover the staple and knot at the top. String a bell through the ribbon and knot the ribbon again to secure it.
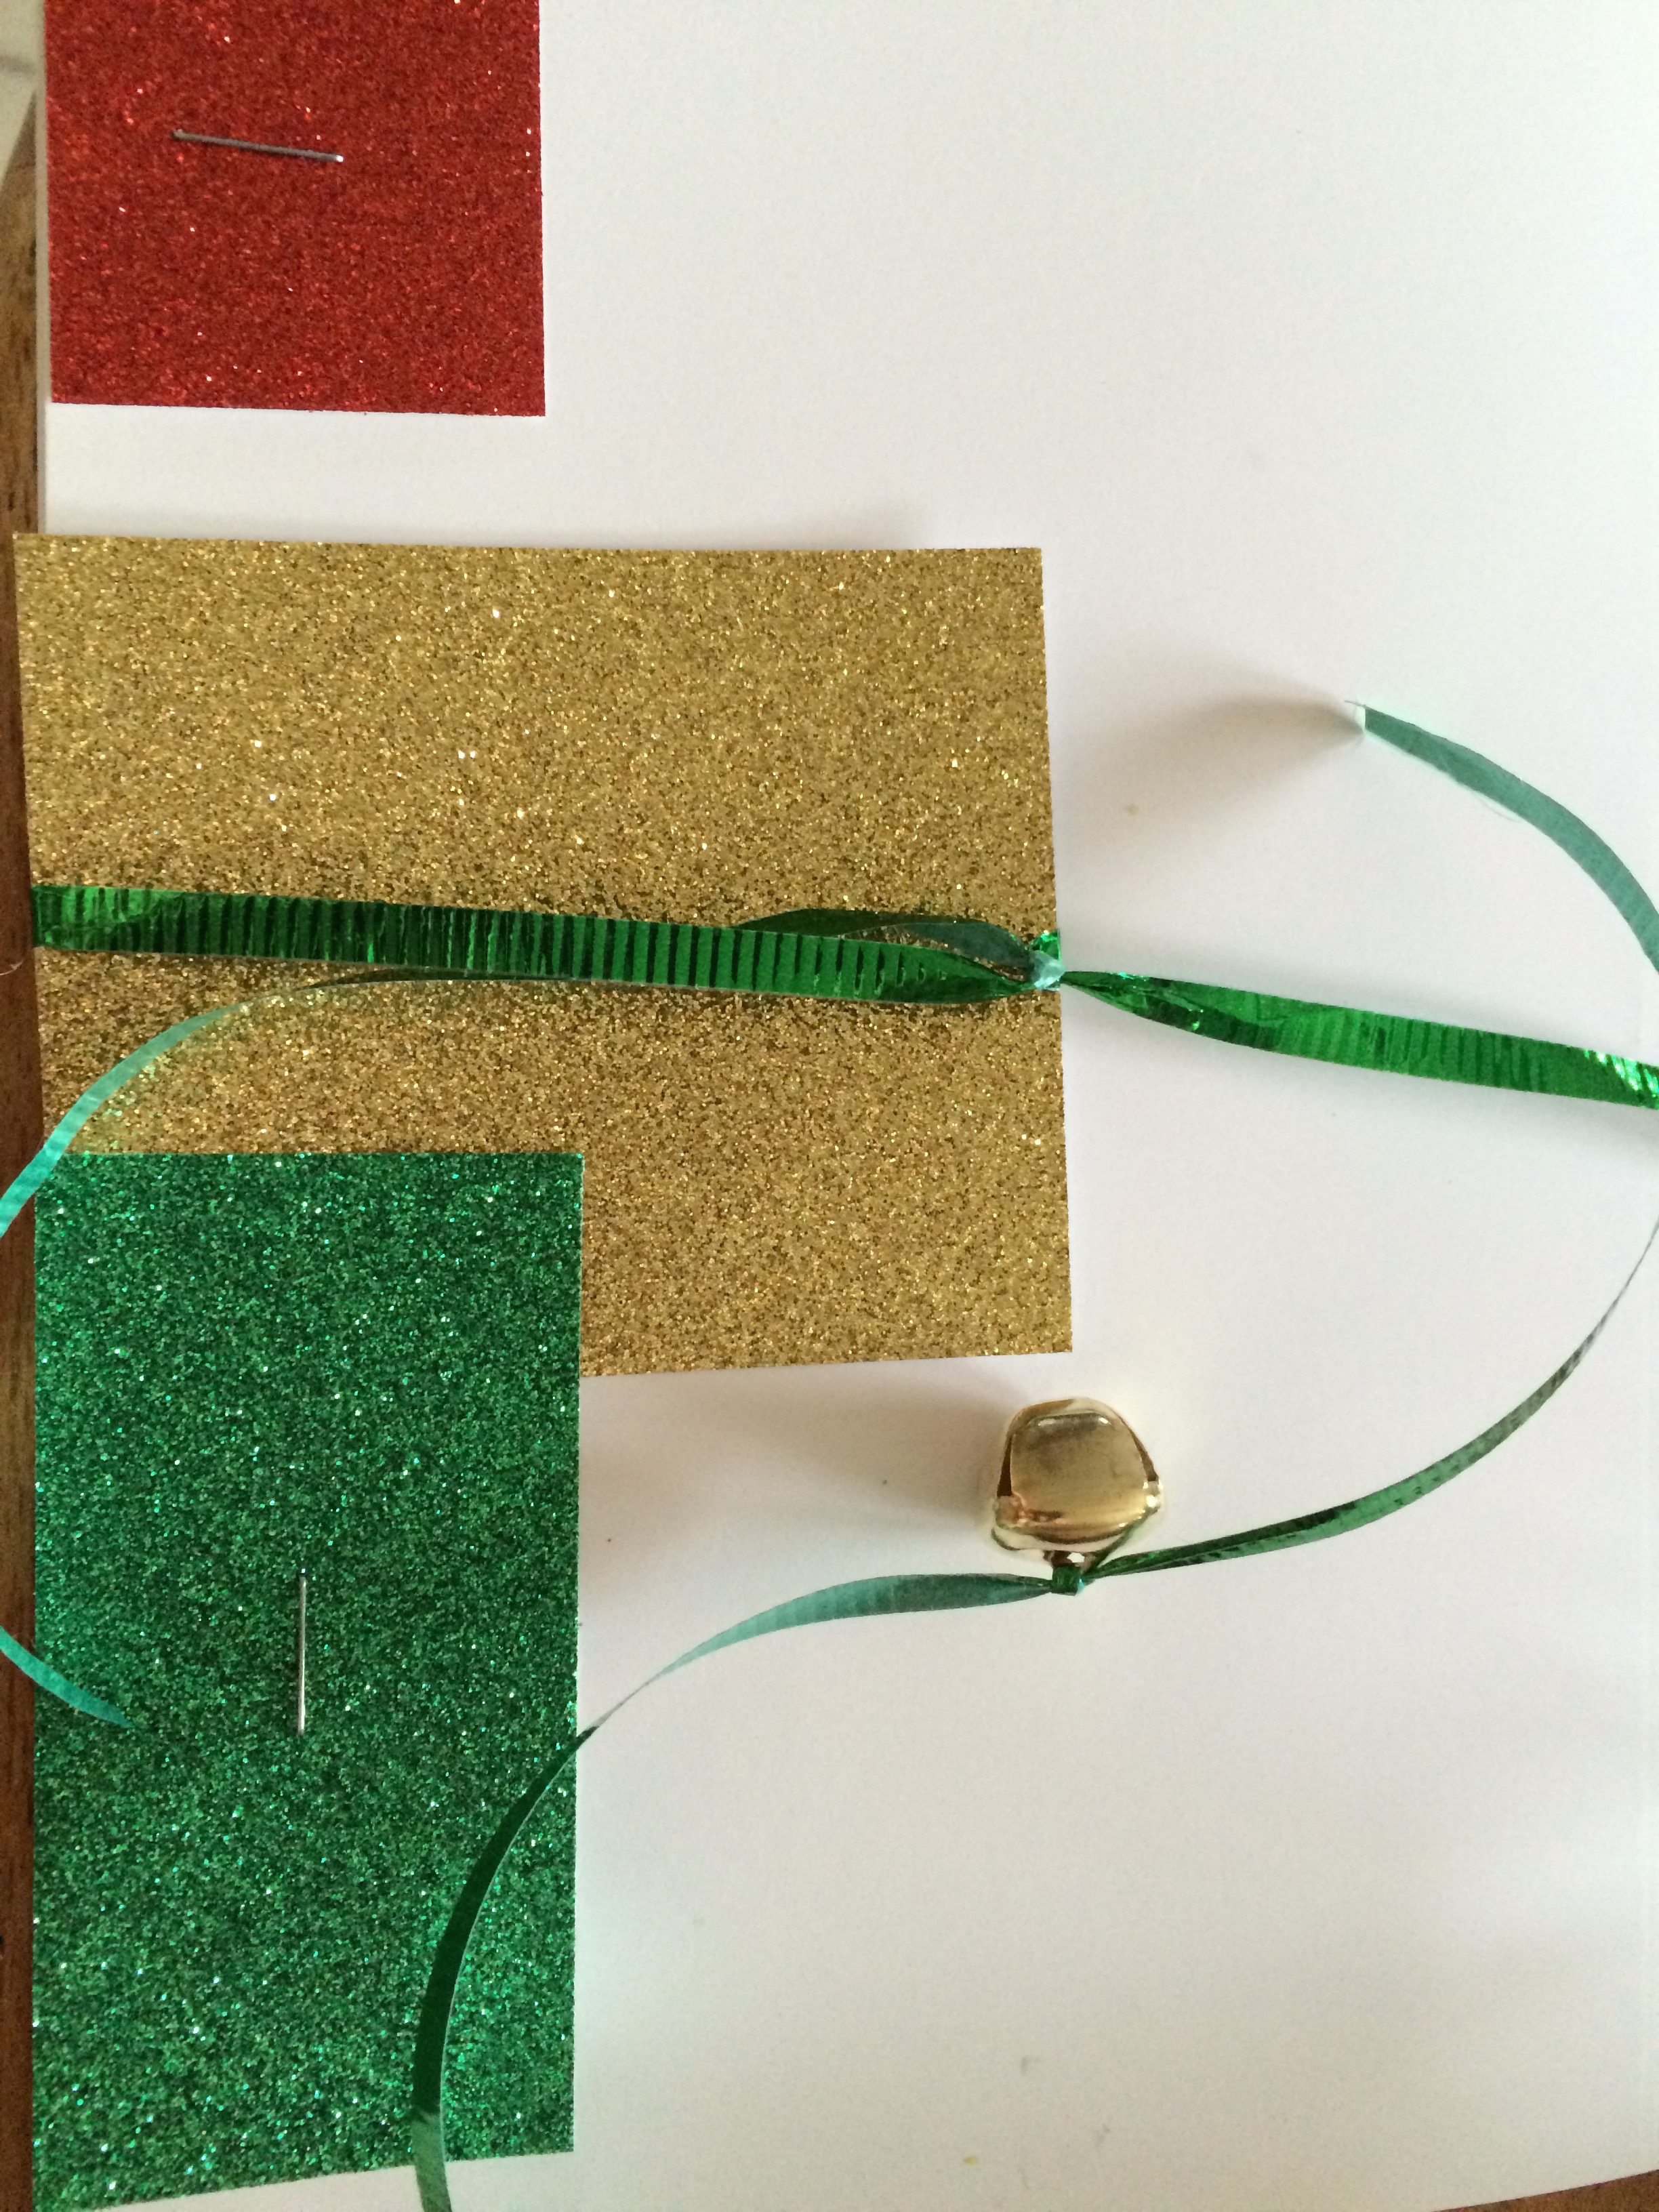
STEP 3
Tie an extra ribbon piece or two and knot them. Curl the ends of the ribbons, and you’re done!

Many of you our there might have a child who enjoys everything there is about LEGOS! Welcome to what I like to call vacuum mine field. Many of you know the endless lego pieces found scattered throughout your home. Or many of you yourself have potentially broke a fingernail or yourself have used a butter knife and maybe even your TOOTH to try to pry or separate a Lego. This post is ALL ABOUT that.
Having 2 boys that love building things and with very active minds we have come to find that once as parents we accepted the defeat of allowing LEGOS into our home that we were potentially doomed. The problem is we had no clue how DOOMED we were. With having other children, smaller children, Legos can become rather dangerous, and for this reason I would like to introduce you with 2 nice things that we have found that have made our lives a bit easier.
Item Number 1 = Lego Building Accessory – Lego Separator
This particular item has become a mini lifesaver in so many ways. My youngest boy (2nd oldest of 4) is a very “hands on” “mouth on” “smell on” “sensory” child. He has to touch things, smell them, put them in his mouth or whatever is needed to get the job done. For that reason this alone has been a great tool to use. He uses his teeth usually to separate his Legos, this genius tool works great at separating them for him. Leaving Legos away from harms “swallowing” way as well as not having teeth marks engraved into each Lego piece. Sometimes in some packs you might get one of these and they come in different colors as well. Just understand that this little tool will save, teeth, fingernails, and you never know…maybe even a life! For LEGO KIDS this is a MUST HAVE!
Item Number 2 = Lego Picker Upper
This is a pretty vintage toy that game out in the later 80s and early 90s. They are harder to come by and maybe you can find one from Ebay or Craigslist or something like that. But if you can get your hands on one of these try to. They make cleaning so much easier for your child and more fun for them as well. We were lucky enough to inherit one of these from my wife’s parents that they used as children. Please see the video displayed below as a demonstration of how this product works. But again a MUST HAVE your child can no longer use the “but mom/dad there’s too many to clean up” excuse. Problem solved. Again if you can find one GREAT if not see the alternative I posted below the video as a “bonus” product
Bonus Product!!!!! My friends have used this for years and I’m sure if you have googled “Lego sweeper” you will get this from other bloggers / mom’s / dad’s etc etc… My friends swear by this but theres just something about the whole – vacuuming up animal hair / crumbs within your Legos that just doesn’t want to make me rush out and do this. I’m content with my “Lego Picker Upper”.
BONUS – Bissell Perfect Sweep Cordless Sweeper – Bissell Vacuum
This Item has been known to do a great job as well and you can go in youtube and check out other people showing demonstrations of how this is used. Whatever floats your boat is fine by me.
I hope that again you found this article helpful and useful and as always, help spread the word!!!
Disclosure: This post contains an affiliate link(s). Thank you for supporting Our Nutshell at no cost to you
]]>Tonight I took it into my own hands, my wife informed me that we had 2 things of ground turkey and that they both need to be used before Friday. So she starts spitting out all of the different things that I can make with them…as she IS THE COOK in this household. I said to myself, hmm I dont want tacos, we had Fajitas last night, and I dont want to make something I made before, I want to step outside of the box and make something different. So I saw a recipe for a “Ground Turkey Casserole” figured, heck I can do that. So like any person with a computer, tablet, smartphone would do I hit up “THE GOOGLE”. I came across this website and this recipe CLICK ME
That said I made some tweaks to it myself because I didn’t have “Egg noodles”. Here is what I did below: (Recipe makes 8 servings)
1 pound ground turkey
1 (15 ounce) can tomato sauce – I used a 24oz
1 teaspoon white sugar
1 (8 ounce) container sour cream
1 (8 ounce) package cream cheese
1 (12 ounce) pkg uncooked egg noodles – I used Wheat Lasagna Noodles
2 cups shredded Cheddar cheese
Directions from the website:
1- Preheat oven to 350 degrees F (175 degrees C).
2 – In a large skillet over medium-high heat, saute the ground turkey for 5 to 10 minutes, or until browned. Drain the turkey, stir in the tomato sauce and sugar, and set aside. In a medium bowl, combine the sour cream and cream cheese. Mix well and set aside.
3 – Cook noodles according to package directions. Place them into a 9×13-inch baking dish, then layer the turkey mixture over the noodles. Then layer the sour cream mixture over the turkey, and top with cheese.
4 – Bake at 350 degrees F (175 degrees C) for 20 to 35 minutes, or until cheese is melted and bubbly.
Those Directions personally for me were a bit more difficult so I will explain my own.
– I took a skillet / frying pan and added in the ground turkey and allowed it to cook until it was done
– While that I heated up my water to boil for the noodles, once the water came to a boil I followed the direction on the package to good the lasagna noodles.
– During all of this going on I got a medium (good medium) sized bowl and added the pasta sauce [I personally used a full 24oz jar of pasta sauce I too approx 18oz out for this and left 6 in the jar] and 1 tsp of white sugar and mixed.
– I then got another medium sized bowl and added in the 8oz of sour cream and one block (8oz) of Philadelphia Cream Cheese. I began to mix and stir with the assistant of my 10 yr old until is was as “saucy” as possible
– At this point I preheat my over to 350 degrees F.
– I then took off the Turkey and stirred it into the medium bowl of pasta and sugar, and stirred them up real well.
– By then the lasagna noodles were done and I grabbed my 9X13 pan and this is where I got the rest of that pasta and put it on the bottom of the pan, so the noodles would not “BURN” to the pan. (smart on my part I thought).
– I placed the noodles in on the pan and spread them out as even as possible, I then added the sour cream / cream cheese mix and tried to spread it out as best as possible. Then I added in the ground turkey and sprinkled the cheese on top.
After I came out with this!!!! I thought it was great and to be honest I was surprised how quick everyone ate it up. Was a great little meal and all in about 1 hour of time!


As a pretty avid Amazon shopper and let me tell you having a PRIME account is a dangerous thing. But yeah, as an Amazon shopper I was looking one day on how to make my iPhone (any phone / smartphone / music payer) louder when taking a shower. Yes, I enjoy listening to music in the shower like most people I know. The problem is that little iPhone speaker can only go / be so loud. I found myself putting it in a higher place just to allow the sound to creep in over the top of the shower stall. Until my searches brought me upon this little gem of a speaker. It is made by Kinivo, and it is one heck of a little find. It’s a portable rechargeable (by usb) speaker. Now I always look at Amazon reviews and generally they are always very helpful. I noticed that some people say that its smaller then you think, and packs a bigger punch then expected. Most every review had a great review for this product, and for a whopping $18.99 I just could not pass that up. So I wanted to put this speaker to the TEST!
Got that package delivered and when I saw the box it came in and the size of it I chuckled. It is rather smaller then one thinks. I do not have huge hands and this thing fits in the palm of my hands. It has good solid weight to it, you can tell its not cheaply made. When I first turned it on and used it and cranked it up a bit I was a little shocked with the output of sound that this little thing delivered. It comes with a headphone plug that you use to plug in into the phone.
The first night I used it in the bathroom I was extremely impressed with the sound. As my wife came and closed the door because it was “too loud”. All of this from this little speaker. I am seriously impressed with the bass and clarity it puts out. I would highly recommend this product, for any man, woman, kid, or child. My only complaint as well as my wife’s complaint was that the buttons are hard to push in sometimes. You almost have to use the very edge of the button to get it just right.
On a side note, for the more tech geeks you can hook multiple speakers in series with one another for a louder affect and sound. To break it down for the “normal” people you can connect one speaker, to another, to another, to another, to another…..get the drift? If you yourself have an amazon prime account you can get the product HERE


Even with a family of four kids and running a business my wife and I find time to always keep a fresh and healthy stock of fresh fruit. And might I recommend if you are looking for a nice day out or for some healthy fun please look around in your local area for blueberry, strawberry or apple picking. There are many things and farms and places out there that you can go and take the family to for a fun day out. Yes sometimes they may charge a bit more but you’re going for the experience and memories not for just the berries / fruit / veggies. We always try to help support local farmers and markets as much as possible as well.
I hope that you found this little blurb informational and hopefully it inspires you to start feeding your child fruits and paving the way for them for years to come. I can guarantee that you will not be disappointed by the outcome.
]]>
INGREDIENTS
1 Jar of Spaghetti Sauce
1 Box of Spaghetti (rozini, rotelle any short fat pasta will do)
1 lb Ground Turkey
2 Cups Mozzarella Cheese
DIRECTIONS
Bring one large pot of water to a boil, once boiling add spaghetti for length of time instructed on package. While waiting for water to boil, heat spaghetti sauce in a separate medium saucepan until heated through. In a large frying pan place ground turkey and 1/2 cup of water, cook through until no longer pink.
Drain spaghetti, return to pan, add sauce, cooked ground turkey and mozzarella cheese.
That’s pretty easy right? Enjoy!
]]>